Traverse Global v11.2 - Service Repair
Release Items
The Release Items function is the starting point of the Warehouse Management System's (WMS) order fulfillment process. This function collects item and quantity information from Sales Order, Production, Service Director, Project Costing, and WMS transfers and material requisitions for all transactions that are due to be picked and shipped. After you build a list of the orders you need to fulfill, you can print a picking list and pull items from inventory.
You can narrow the list of orders retrieved by this function by filtering the Source column so that it contains only sales orders, or only production components, or a combination of transfers and requisitions.
If you use a multiuser system, WMS groups released orders by user and workstation ID. You can view the orders that were released by another user on a different workstation, but you can only enter picked quantities and apply them to your own order.
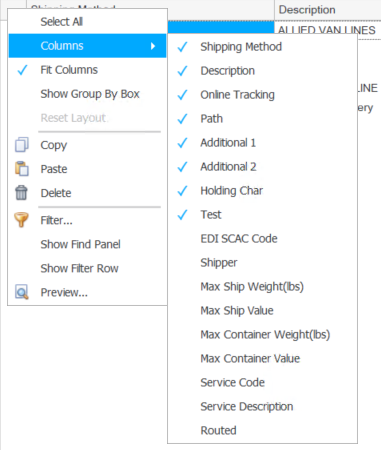
You can hide or show columns in the grid by right-clicking on the upper left corner of the grid and selecting the fields to show or hide from the Columns submenu.
The Status of the order is defined as follows:
- Released: Any sales order, production order, inventory transfer, material requisition, or purchase return in Traverse that is released but not assigned.
- Assigned: A picker is assigned to pick the item.
- Picking: An item from the Pick ID that is picked but not saved (the item, bin, and quantity are entered into the system).
- Picked: An item from the Pick ID that is picked and in a working bin waiting to be put into inventory or picked to ship.
- Packed: The Pack function is confirmed.
New tab command buttons:
| Click | To |
|---|---|
| OK | Release the selected line items. |
| Activity | Display the Activity Log to view activity. |
| Reset | Set all fields to their default values. |
| Select All | Mark all check boxes to select all line items. |
| Unselect All | Clear all check boxes to unselect all items. |
| Options | Open a data filter window to filter the data presented in the New and Released sections. |
Released tab command buttons:
| Click | To |
|---|---|
| Refresh | Refresh the data. |
| Assign | Assign a picker to an item on a picking list. |
| Unrelease | If an order has a status of 'Assigned' or 'Released', this will unrelease the items on the order and move the order back to the New tab. |
| Cancel Order | Cancel all items on the selected order. Items can be canceled if the status is one of the following: Picking, Picked, Staged, or Packing. NOTE: Orders cannot be canceled if at least one item is in the status of 'Packed' or if 'Pick and Pack Together' was performed. |
| Print the picking list. See Step 7 above. | |
| Export | Export the picking list. |
Conditional Formatting
You can use conditional formatting on both the New tab and the Released tab to add formatting that allows you to see records that meet specific conditions at a glance. This is the same conditional formatting you can use on interactive views. See more conditional formatting information. Use the conditional formatting icon ( ) to open the Conditional Rules Formatting Manager window.
Note: If the item on the order is a kitted item, the New tab will list the kitted item (with no bin ID) and each item within the kit. Use the Column Chooser to add the Kit ID field to the grid to help identify the items in the kit. Select all of these lines when creating a picking list.
Note: If a sales order is released from SO Orders by using the Release button, any text in the Notes field on the sales order will display in the Notes column in the WM Release Items screen.

- On the New tab, select a Location ID from the drop-down list. Use the Refresh button if necessary to refresh the grid.
- Select line items to release. Use the Select All button on the toolbar to mark all line items, or Unselect All to clear the check boxes.
- Click OK to release the items selected on the New tab. Once the items are released they will be removed from the New tab and moved to the Released tab.
- Enter or select a picker to assign to the selected items in the Assigned To field, or leave the field blank.
- Accept or edit the Pick Date.
- Use the Notes field to enter any notes for the release.
- Click OK to complete the assignment and release the items.
- A notification window will appear when the release items process is complete.
- The Picking List screen opens. Select the picking lists to print. Use the All button to select all released pick lists, or None to clear the check boxes.
- To print Bar Codes on the picking list, mark the check box; otherwise, clear the check box.
- To print the Quantity Total on the picking list, mark the check box; otherwise, clear the check box.
- Mark the check box to include a Page Break between each item
- Mark the Banded Rows check box to print the report with every other row highlighted for ease of reading.
- Click a command button to:
Click To Print Process the selected picking list(s). Output Output the report as a PDF. Send Save the report as a PDF and attach it to an email using your default mail program. Preview View a preview of the Picking List. Reset Set all fields to their default values.
The Items task pane shows a snapshot of current on-hand quantities and bins in the selected location, as well as the last 10 transactions for that item.
Note: Quantity available = quantity on hand - quantity committed
You can pin and unpin the task pane to the side of the Traverse window by clicking the pushpin icon. When the pushpin icon points down,  , you can always access the task pane. When the pushpin icon points to the left,
  , you must hover your cursor over the Tasks tab on the right-hand side of the Traverse window to use the task pane.
Note: You can select True from the ShowTaskPanel field in the View > Preferences... screen to default task panes across the entire system to automatically expand when opening applicable functions. Selecting False in the ShowTaskPanel field defaults task panes to stay closed when opening applicable functions. Even when set to False, you can always use the pushpin icon to pin and unpin the task pane to the right-hand side of the Traverse window.